Cross Setup

Welcome  •  Explanation   •  Purpose   •  Cross Symbols  •  Cross Construction   •  Cross Setup
Picture Gallery Main  •  Obtain Your Cross  •  Encourage Others   •  Ministry for Christ

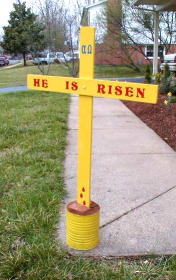
The setup of the Resurrection Cross is a snap!
Take a look at these simple instructions and you'll see for yourself.  All you need is a hammmer — but you don't need to beat on the cross — just pound some nails into the ground!  And you don't even need a hammer if you tie the cross to a tree or post!

EASY SETUP --
see instructions and diagrams below.

Easy setup

NOTE: Erecting the cross in this way enables it to withstand very heavy winds.

Erecting The Cross -- Method 1: Use the strings and nails

1.

The components of the cross consist of the following, in addition to the assembly instructions (see Figure A):

  • Two brightly painted, wooden boards; one for the cross beam and one for the upright.
  • Special bolt with wing nut.
  • Heavy duty monofilament strings which are looped at the ends.
  • Four 8½ inch galvanized nails used as stakes.
 

Figure A

Figure A

2.

Bolt the two boards together tightly, then lay down the cross where you want to erect it. Drive the first two nails into the ground at a 45 degree (approx) angle pointed toward the foot of the cross. See Figure B which shows the nails placed on either side of the cross beam. Drive nails down until just a half inch or so remains above ground level.


Figure B

Figure B


3.

Take a string and put the looped ends onto the two nails. Then, stand the cross up with the string looped around the top as shown in Figure C.

Lean the cross slightly backward so it stands up without having to hold it.

Figure C

Figure C


4.

Drive a 3rd nail into the ground as shown in Figure D. Put the string on the nail and loop it around the top of the cross as indicated.

NOTE: This string must always be done 2nd, not 1st. Otherwise it may slip between the boards.

5.

Put the string on the last nail and pull firmly; then, drive the nail into the ground as shown in Figure E. Now, straighten the cross to a more upright position; this tightens it in place. Your cross should be able to withstand 50 mph winds.

To prevent someone from tripping over the strings, put some colorful ribbons on them.

Figure D

Figure D


Figure E

Figure E

Erecting The Cross -- Method 2: No strings and no nails

The photo in Figure F says it all.

• Get a large coffee can --
    (paint it if you want).

• Put in two bricks.
   (Use the slightly smaller type.)

• Put the cross in between them.
   (You might want to put a small
   plastic bag on the bottom of the
   cross first.)

• Fill the can with dirt and pack
  it in hard.

Figure F

To see a
larger
picture
of this
photo

Is that easy or what!?  Now you don't even need the instructions!
†   
(But don't worry, they're included anyway.)   

Back to top

Go to PICTURE GALLERY next ——>

 
Click here